Initial Setup
Step 1: Turn On the Terminal
Power on your Pulsar POS Terminal by pressing the Power button on the device. Once it's on, you're ready to begin the setup process.
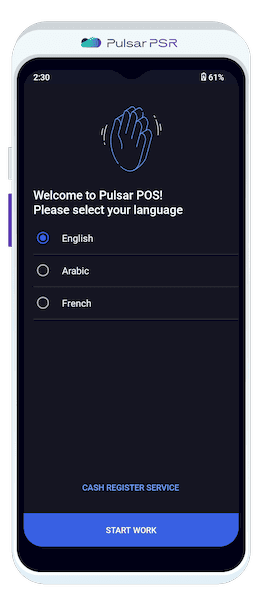
Get started by selecting your preferred language.
Step 2: Choose Your Interface Language
Select the interface language for the terminal. Options include:
- 🔹English
- 🔹Arabic
- 🔹French
Once you've made your selection, press the "Start Work" button to continue.
Step 3: Access Additional Information
For more technical details, such as the IMEI Number and OS Version, tap on the 'Cash Register Service' option. This will display essential technical information about your device.

Access detailed information for system diagnostics and settings.
Step 4: Connect to the Internet
Choose your preferred connection method to get your terminal online:
- 🔹SIM Card
- 🔹Wi-Fi
- 🔹Local Network
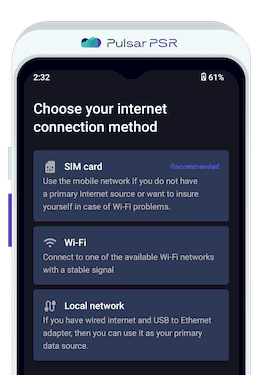
Ensure a stable connection for seamless operations.
Step 5: Set Date and Time
Set the Date and Time settings, ensuring you select the correct Time Zone for your location. This will guarantee accurate timestamps for your transactions and reports.
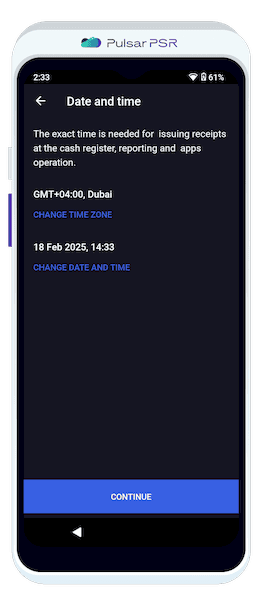
Ensure your system is correctly synchronized to avoid any time-related discrepancies.
Step 6: Accept Terms of Use
Carefully review and accept the https://cdn.psr-it.com/static/privacy-policy/psr-privacy-policy-en.pdf to proceed with the terminal setup. This ensures you understand the conditions for using the Pulsar POS system.
Step 7: Verify Your Phone Number
Enter your phone number for account verification. You will receive an SMS with a 5-digit code (OTP) to confirm your identity.
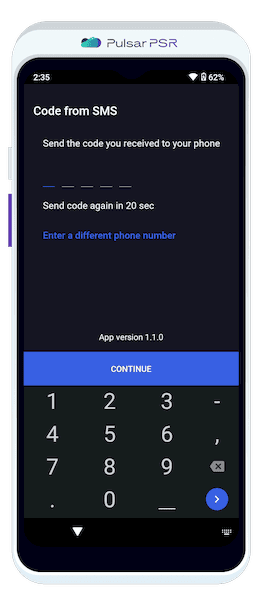
Enter the code to complete the verification process.
Step 8: Set Up Your Store
Create a new store if this is your first setup, or select one from the list if you already have existing stores. This will link your terminal to your specific business location.
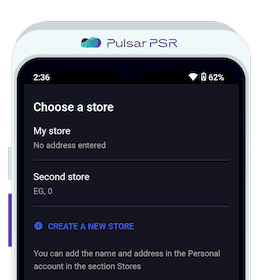
Choose the right store or create a new one for accurate sales and inventory tracking.
Step 9: Employee Authorization
Select the employee who will be authorized to use the terminal. If required, enter the PIN code to grant access. This ensures secure and personalized access for each user.
Step 10: Setup Complete!
Congratulations! Your Pulsar POS Terminal is now fully set up and ready for use. Start processing transactions and manage your business with ease!